Sunday, August 5, 2018
Redirecting to New Blog
You are being redirected to my current blog as this one is no longer active. All content from this blog has been moved to my new blog.
Wednesday, January 7, 2015
Ham and Beans! THM E
I really like ham and beans. I am, however, the only one in my family who does so it is not a meal I make, ever. Then of course there is the fact that I eat the Trim Healthy Mama way by keeping my fats and carbohydrates separate. Ham and beans combines fat and carbs, normally...but I have found a delicious and EASY way to make this super satisfying meal without all the fat so it is a delicious E meal. And better yet, if you don't already have all the ingredients in your home you can easily grab them at any grocery store for cheap! :)
So, let's get to it:

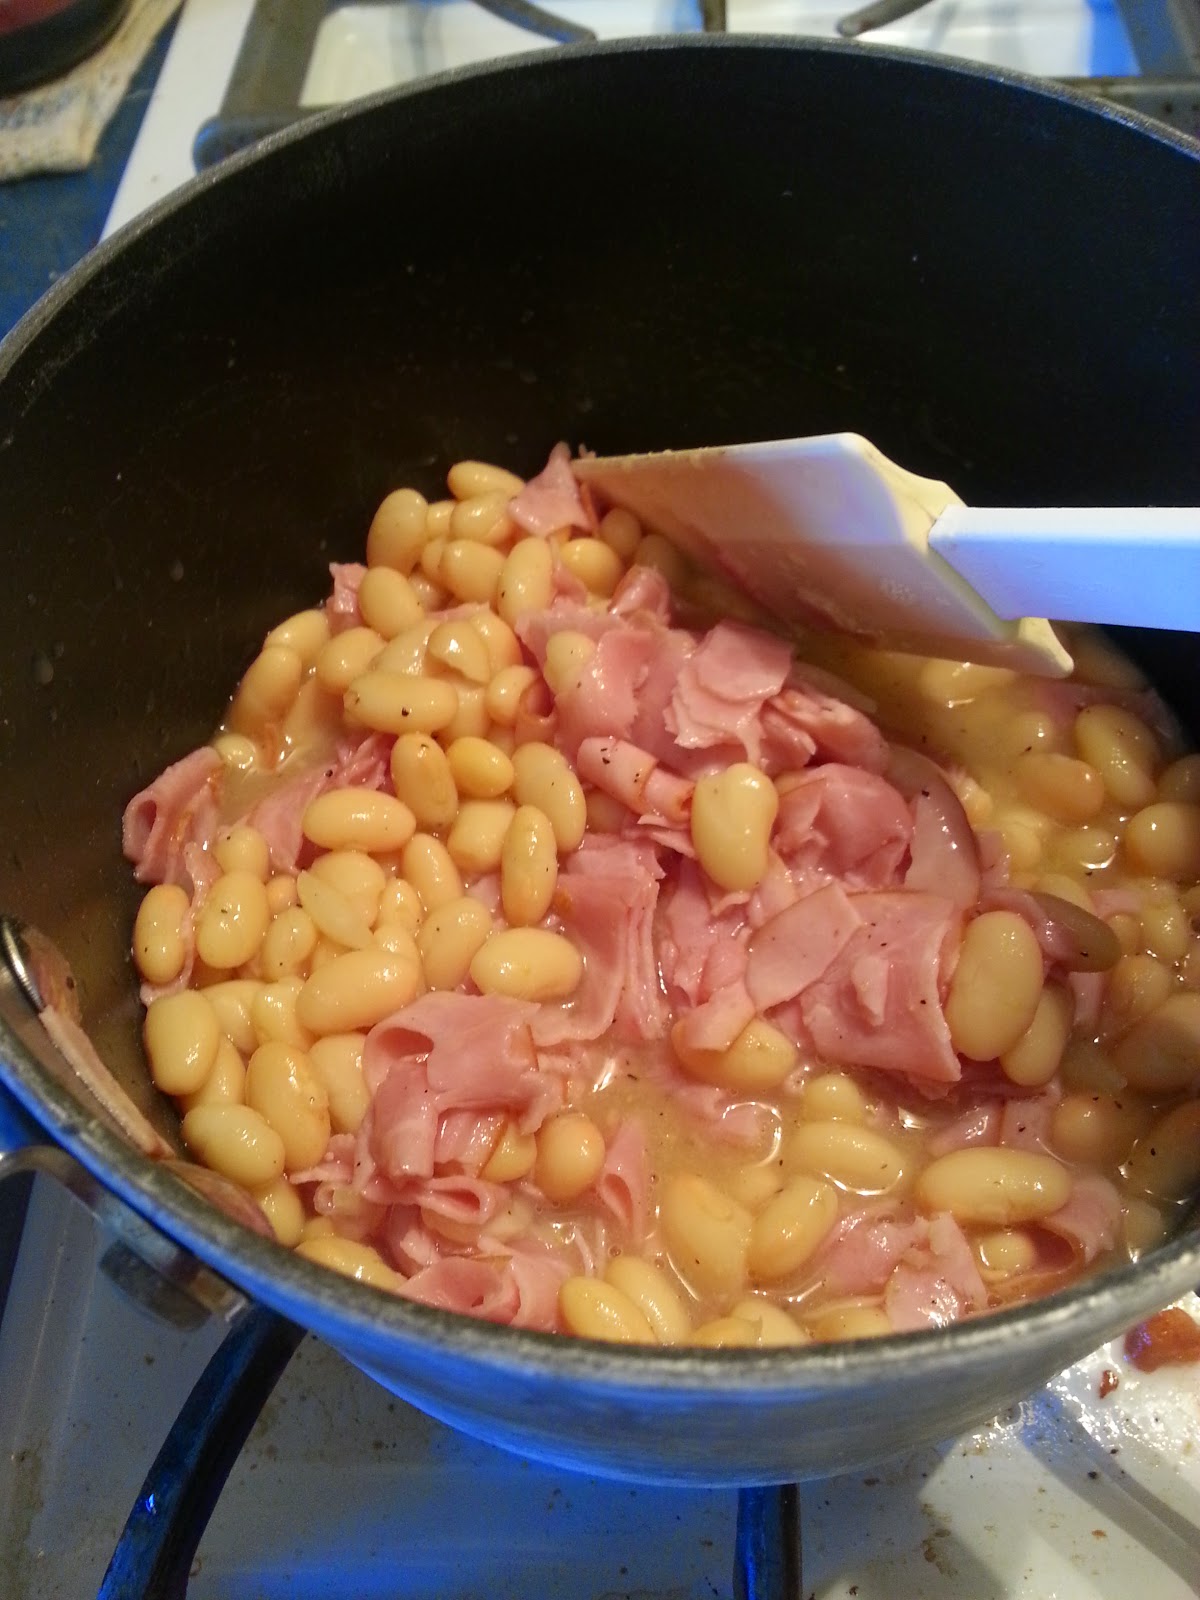
See that picture above? That is all you need! (Well, okay, you may want some seasonings, but those are personal preference items that you will definitely have in your house.)
So gather a can of Great Northern Beans and 4 oz of lean deli ham and whatever seasonings you like. I like salt, pepper and nutritional yeast. I don't measure, just sprinkle in to taste. Put all your ingredients in a pot. (Please ignore my dirty stove top!)
 Now let it simmer for a while. (You can use a higher heat for 5 - 10 minutes or a lower heat for longer.) It doesn't need to cook, just heat through. Pour it into a bowl.

Now try to wait long enough to eat it that you don't burn off the top layer of your tongue! I may have eaten it when it was a little too hot the first time. :)
This is an E meal and you can eat the whole thing. Amazingly enough, Great Nothern Beans are one of the lowest in carbohydrates and a whole can has 35g of carbs or less. :) And I promise that this is one E meal that WILL fill you up. Enjoy!
So, let's get to it:
See that picture above? That is all you need! (Well, okay, you may want some seasonings, but those are personal preference items that you will definitely have in your house.)
So gather a can of Great Northern Beans and 4 oz of lean deli ham and whatever seasonings you like. I like salt, pepper and nutritional yeast. I don't measure, just sprinkle in to taste. Put all your ingredients in a pot. (Please ignore my dirty stove top!)
Now try to wait long enough to eat it that you don't burn off the top layer of your tongue! I may have eaten it when it was a little too hot the first time. :)
This is an E meal and you can eat the whole thing. Amazingly enough, Great Nothern Beans are one of the lowest in carbohydrates and a whole can has 35g of carbs or less. :) And I promise that this is one E meal that WILL fill you up. Enjoy!
Wednesday, December 24, 2014
CHRISTMAS COOKIES

Christmas Cookies!
Do you think it is impossible to make a rich, decadent cookie that is both carb and sugar free? Well think again! This Christmas I was able to find recipes to make 6 different, rich and decadent cookies. I have included links to every recipe and the recipe for my very favorite sugar free sweetener below. The cookies are pictured above and are as follows, clockwise from the top:
Snickerdoodle - Made with the THM Holiday Cookie recipe (This recipe link will only be good for about a month so write it down! I tweaked it by adding 1/4 tsp cream of tartar to the dough and then rolling the cookies in 2TB of sweetener mixed with 1 tsp cinnamon).
Pecan Snowball - Thank you Jennifer Griffin for this recipe!
Magic Cookie Bar - Oh, my, AMAZING!! These don't miss anything from their sugar laden original! My tweak on these - The recipe calls for 1 TB of molasses, which is a bit much for a truly THM friendly cookie. Instead, I added one extra TB of sweetener and 1 tsp of molasses and a 1/4 tsp of caramel extract. The caramel sauce did not need any more. This caramel sauce is DECADENT!
Maple Butter Cheesecake Fudge - Thanks again Jennifer Griffin!
Peanut Butter Fudge - The recipe for this fudge is printed at the end of the video. Again, it will be gone in a month so write it down!!
Chocolate Chip Cookie - Also an adaptation of the THM Holiday cookie recipe. Just followed the recipe and added 1/2 a cup of chocolate chips. Write this recipe down so you don't lose it!
Now, for my favorite sweetener! In my many attempts to make sweet treats that my whole family will like I have tried many different sweeteners. My problem is that my family likes things much sweeter than I do, but when you add too much of a stevia based sweetener it can get bitter fast. I have found the solution for our family! I saw a recipe mixing stevia, erythritol and xylitol about a year ago. I could not ever find who originated the recipe, but I tweaked it just a bit for frugality sake. :) Here is my go to sweetener for all things:
Mix together
1 cup xylitol
1 cup erythritol
1 tsp stevia
Put all ingredients in a jar or canister and shake to combine. You can powder this sweetener but it is not required. Just shake it together and use in equal measurements that you would sugar. It offers great sweetness with no funny aftertaste. (Be aware that some people do not handle xylitol well as it causes tummy troubles for some. If you haven't tried it before go easy at first to make sure you tolerate it. My family has no trouble with it. Also, xylitol, like chocolate, is not good for dogs so keep it away from your pets.)
Have a very Merry Christmas and a Blessed New Year!
Monday, November 10, 2014
Spiced Chocolate Coconut Bars - THM S

Yummy! This is by far my favorite chocolate candy recipe! Since starting Trim Healthy Mama I have made all kinds of plan friendly chocolate candies. My first attempt of course was Skinny Chocolate from the book (page 371). I have had lot's of success (and a couple failures) with that recipe and many variations thereof. :) It is a great recipe that you should really try!
My mom brought me a present last night and it was so yummy I wanted to share it with you. She found the original recipe from an Atkins site but she tweaked it to make it more THM friendly. It is absolutely my favorite chocolate bar ever. I am going to list the recipe below exactly the way she made it because it was so good.
Spiced Chocolate Coconut Bars - THM S
- 1 c extra virgin coconut oil
- 1/2 c unsweetened cocoa powder
- 1/2 c xylitol (ground)
- 1 tsp cinnamon
- 1/4 tsp cayenne (this recipe is NOT hot at all. You only feel the cayenne a tiny bit after you swallow. You could easily add more if you like heat, but this bit gives it the perfect amount of flavor without heat!)
- 5 TBS unsweetened shredded coconut flakes (divided)
- 1/4 tsp kosher salt (optional)

Let's make it!
- Gently melt coconut oil and grind the xylitol
- Whisk together oil, xylitol, cocoa, cinnamon and cayenne till smooth.
- Add 3 TBS shredded coconut and mix well


- Pour chocolate into a parchment lined pan or candy molds. I used squares and cute snowmen and snowflakes!


- Mix remaining 2 TBS of shredded coconut and salt together in small bowl.

- Sprinkle coconut mixture over the top of chocolate. (My mom has really finely ground coconut and it did not rest on top, but sunk in. Yours may do the same thing, but the idea is to have a layer, even if it is sunken in.)


- Put chocolate in freezer for 15 minutes to harden.
- Remove from pan (molds) and cut or break into pieces and enjoy!

- Store in the refrigerator.
Want to change it up? Here are some ideas:
- Don't like coconut flavor? Use refined coconut oil and omit the coconut flakes.
- You can add chopped nuts if you want to add crunch. It really is delicious!
- Want to have this on a Deep S day of fuel cycle? Leave out the coconut flakes keeping everything else the same.
- You can of course use any on plan sweetener that you prefer, but I really like xylitol in chocolate. If you are using straight erythritol use the same measurements as above. If you are using Truvia or THM SweetBlend then you will want to start with half the amount and taste and add more if necessary.
This is so good it will probably become my go to chocolate bar. I hope you like it as well.
Monday, November 3, 2014
My Thanksgiving Menu
I am so excited about Thanksgiving this year! I started my Trim Healthy Mama journey right after Thanksgiving last year, but I had already started implementing the plan a bit. This year I am hosting Thanksgiving and have a fully on plan feast all lined up!

The first thing on my menu is the turkey of course. This year we are getting a turkey fresh from the farmer that we buy our milk from. We are really excited about this since we have never had a fresh turkey before.
Here is what we are having alongside the bird:

The first thing on my menu is the turkey of course. This year we are getting a turkey fresh from the farmer that we buy our milk from. We are really excited about this since we have never had a fresh turkey before.
Here is what we are having alongside the bird:
- Stuffing
- Mashed Cauliflower
And for dessert:
How is your holiday planning going?
Saturday, November 1, 2014
Sweet Potato Casserole ~ THM Crossover or E

No, that is not a picture of a sweet potato casserole. :) Unfortunately, that picture will have to wait till after Thanksgiving. For now, enjoy the lovely pic of raw sweet potatoes!
Sweet potato casserole is my Thanksgiving day "splurge". Sure, I am going to make lots of yummy treats for Thanksgiving day, I have a few different desserts planned even. But all of those fit into the S day I have planned for Thanksgiving. (If you have no idea what I am talking about then I highly suggest going over to Trim Healthy Mama, ordering their book and having your life changed!) Sweet potatoes are an E food though and this recipe is actually a crossover all by itself. But it is Thanksgiving! It is a feast day! I don't intend to derail all the hard work I have done for the past year with a day of eating junk, but I do intend to feast! And this dish will be a part of this feast.
Like I said, this recipe, as written, is a crossover food. It contains both a significant amount of carbs and fat. This is the way I will serve it on Thanksgiving. The rest of the food will be S food (even the stuffing!) so adding this dish to it will make my meal either an S Helper (if I have a very small serving) or a crossover if I have a regular sized serving. At the end of this post I will put in tweaks you can use to make this recipe an E recipe.
~ PIN IT ~
Sweet Potato Casserole - THM Crossover
Potatoes
- 6 baked sweet potatoes, peeled and mashed
- 1/2 c Truvia (or 3/4c xylitol or erythritol)
- 2 eggs*
- 1/3 c half and half or heavy cream*
- 1/3 c melted butter*
- 1 tsp vanilla
- 2 tsp cinnamon
Topping
- 1 c Truvia (or xylitol or erythritol)
- 3/4 tsp molasses
- 1/8 tsp of caramel, butterscotch or rum extract
- 1 c chopped pecans*
- 1/3 c almond flour*
- 1 tsp cinnamon
- 1/3 c melted butter*
Let's make it!
- Preheat oven to 350 degrees and lightly grease a 9x13 baking dish.
- Combine potato ingredients with a hand mixer and put mixture in baking dish. (I am baking the sweet potatoes a day ahead of time to save time on Thanksgiving day. In fact, lots of this recipe could be done the day before. You could also combine all the topping ingredients (except butter) and store them in a baggie till the next day).
- In another bowl combine sweetener, molasses and extract together to make "brown sugar". Then stir in all other topping ingredients to make a crumble.
- Pour crumble evenly over the top of potatoes.
- Bake for 35 minutes.
*E Tweaks
Anything you see above that has an asterisk needs to be adjusted for an E variation, but the assembly/cooking process is exactly the same. Here is the E variation:
Sweet Potato Casserole - THM E
Potatoes
- 6 baked sweet potatoes, peeled and mashed
- 1/2 c Truvia (or 3/4c xylitol or erythritol)
- 3 egg whites (or carton egg whites)
- 2/3 c almond milk
- 1 tsp vanilla
- 2 tsp cinnamon
Topping
- 1 c Truvia (or xylitol or erythritol)
- 3/4 tsp molasses
- 1/8 tsp of caramel, butterscotch or rum extract
- 1 c old fashioned rolled oats
- 1/3 c oat flour (just grind rolled oats in your blender)
- 1 tsp cinnamon
- 8 tsp melted butter (if you make this into 8 servings this is the entire amount of your added fat for an E meal)
I hope you enjoy this recipe! Look for a post in the near future that includes my entire Thanksgiving menu!
Wednesday, October 29, 2014
Red Velvet Cheesecake Brownies - THM S

Decadent. That is the only appropriate word for this dessert. Seriously. This dessert is amazingly delicious.
This is the first attempt I had made at taking a tried and true recipe that my family loved and turning it into something acceptable for the Trim Healthy Mama way of eating. And do you know what? It wasn't even hard! I couldn't believe how well it turned out.
Here's the story: it was my daughter's 17th birthday and she wanted Jamie's Red Velvet Cheesecake Brownie for her birthday cake. We have made this recipe several times and it is amazing! It is not, however, kind to the waistline! :) Well, I certainly was not going to deny my daughter (who has no weight issues whatsoever) what she wanted on her birthday, but I really didn't want to deny myself such a delicious treat either and I wanted to know if I could make a reasonable substitute. So with Jamie's recipe as a launching pad I headed to the kitchen.
I didn't make a good substitute...I made a GREAT substitute! Everyone was impressed by how good it was and some even preferred the THM version to the original! Glory! So this dessert no longer has to be relegated to a once a year treat. The whole family can enjoy it knowing they are not doing any lasting damage to their health. Here is how you do it:

Red Velvet Cheesecake Brownie - THM S
Red Velvet Layer
- 1 cup butter, melted
- 2 cups xylitol (I know this seems like a lot, but the original recipe called for 2 cups of sugar. You could use 2 c erythritol or 1 1/2 c truvia but I like xylitol in chocolate recipes)
- 1/3 cup unsweetened cocoa powder
- 4 eggs
- 2 tsp vanilla
- 3/4 cup almond flour
- 1/2 cup oat fiber
- 1/4 cup coconut flour
- 1/2 tsp salt
- 1 tsp red food coloring gel (you can find this in the cake decorating section of Walmart. This color does not change the flavor so if you don't mind not having the red color you can make these without the coloring)
- 1/2 - 1 cup sugar free chocolate chips (or chopped skinny chocolate or chopped 85% dark chocolate bar)
Cream Cheese Layer
- 8 oz cream cheese, softened
- 1/2 cup xylitol (you could also use 1/2 cup erythritol or 1/3 cup truvia if you prefer)
- 1 egg
- 1 tsp vanilla
Let's make it!
Brownie layer
- Preheat oven to 350 degrees.
- Put butter, xylitol and cocoa into mixing bowl. Mix until well blended.
- Add eggs one at a time, mixing after each egg.
- Add vanilla and mix.
- In a separate, small bowl, stir to combine almond flour, oat fiber, coconut flour and salt.
- Add flour/salt mixture to wet ingredients and mix till well combined.
- Add food coloring gel and mix till combined.
- Stir in chocolate chips.
- At this point you have a couple options. You can either grease a 9x13 pan well if you intend to serve the brownies from the pan (this worked fine for me, they do not stick to the greased pan) or if you want you can line the pan with parchment paper (grease the parchment paper after you line the pan with it) if you want to lift the brownies out of the pan to cut and serve.
- Pour batter into greased pan and spread it out evenly. Set aside.

Cream Cheese Layer

- Place cream cheese in mixing bowl and beat till fluffy.
- Add xylitol, egg and vanilla and mix until everything is incorporated and fluffy.
- Drop cream cheese mixture by spoonfuls over the top of the brownie layer in the 9x13 pan.
- Drag knife through the cream cheese and brownie layers to create a swirl pattern.

- Bake at 350 for 40-50 minutes or until brownie layer is set. Make sure to check it at the lowest time to be sure your cheesecake layer does not become too brown.
- Allow brownies to cool for at least 15 minutes before attempting to remove them from the pan (whether you used parchment paper or not).
- Slice and enjoy!
~ PIN IT ~
Subscribe to:
Posts (Atom)